
The Ultimate Quest 3 PCVR Setup Guide:
Minimum Specs, Best Settings, Games, and Essential Accessories
The Quest 3 is already a capable standalone VR headset, but connecting it to a gaming PC opens up a much larger PCVR experience. You can access demanding PCVR games with higher quality graphics in a detailed environment and advanced physics including in the SteamVR library with the right setup.
Setting up PCVR involves more than simply connecting a headset to a computer. A list of variables are involved those directly affect the feel and experience including graphics card, processor, connection method, network and refresh rate. The list is even longer and includes render resolution and used accessories used on the play.
A properly configured setup can deliver a much smoother experience contrary to a poorly optimized setup may result in stuttering, blurry visuals, unstable frame rates, connection problems, or uncomfortable play sessions.
This Quest 3 PCVR setup guide explains how to set up PCVR step by step including what PC specifications you need. Whether wired or wireless PCVR is better, which settings to start with, what games are worth playing, and which accessories can improve your setup.

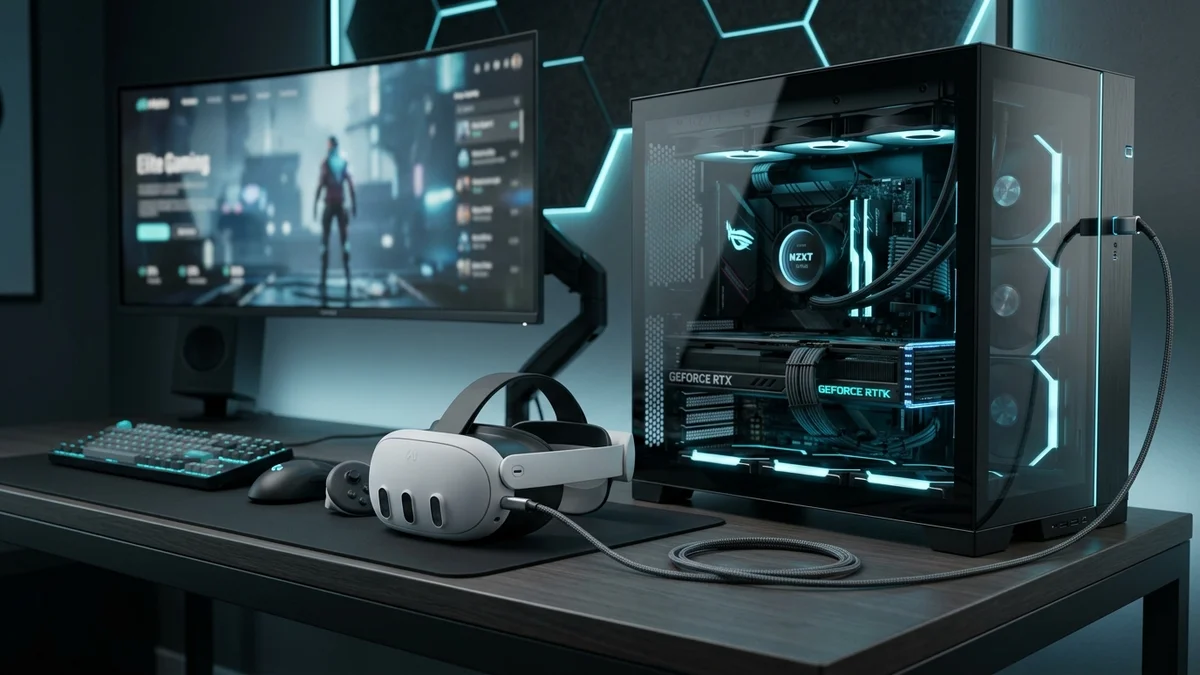
What Do You Need to Play PCVR on Quest 3?
To play PCVR games on Quest 3, you need four basic components:
Quest 3 officially supports PC VR through Meta Quest Link using either a compatible USB cable or an Air Link Wi-Fi connection. Steam Link provides another wireless route for accessing SteamVR games.
Your PC does most of the demanding graphics rendering work. Instead of relying only on the headset's mobile processor, the computer renders the game and sends the resulting image to your Quest 3. And the Quest headset simply displays the visual and does not utilize its processor for rendering.
Why Does It Matter?
While you simply rely on the Quest 3/3S mobile processor for video rendering and other OS processes, you cannot upgrade the Quest 3/3S processor or memory for an upcoming high graphics intensive game. Whereas you are in full control when the graphics and processes are utilizing the resources from your PC. You can just simply upgrade any PC part and still utilize the Quest 3/3S for getting the VR experience.
You simply cannot upgrade a Quest 3/3S mobile graded processor so you are in full control of your computing headroom on PC. That is why the quality of your PC hardware matters so much.
Quest 3 PCVR Minimum and Recommended PC Specs
One of the most common questions from new Quest owners is:
What PC specs should I have for Quest 3/3S PCVR?
There is no single specification that guarantees ideal performance in every VR game. A simple VR title and a heavily modified simulator can have dramatically different requirements.
For Steam Link specifically, Valve currently lists Windows 10 or newer, an NVIDIA GTX 970 or AMD RX 570 or better as minimum GPU requirements. Valve recommends 16 GB of RAM and an RTX 2070 or better for a stronger experience.
For a modern PCVR build, however, it makes sense to aim higher than the absolute minimum.
Quest 3 PCVR Hardware Specification Tiers
| Component | Entry-Level PCVR | Recommended | Higher-End PCVR |
|---|---|---|---|
| GPU | GTX 970 / RX 570 class or better* | RTX 3060/3070-class or equivalent | RTX 4070-class or better |
| CPU | Older supported quad-core CPU | Modern Core i5 / Ryzen 5 | Modern Core i7 / Ryzen 7 or better |
| RAM | 8 GB depending on platform/game | 16 GB | 32 GB |
| Storage | SSD | NVMe SSD | Fast NVMe SSD |
| OS | Windows 10+ | Windows 11 | Windows 11 |
| Network (Wireless) | 5 GHz Wi-Fi | Wi-Fi 6 | Wi-Fi 6E with optimized network |
*Exact compatibility and individual game requirements should always be checked before purchasing hardware.
GPU: The Most Important Component for PCVR
For most PCVR gaming setups, the graphics card plays the key role on visual quality and performance.
VR demands runtime capacity from the GPU since your computer must render a high-resolution scene while maintaining a stable frame rate. Quest 3 has a physical display resolution of 2064 × 2208 pixels per eye, so increasing PCVR render resolution can quickly increase GPU load.
An older GPU may still run less demanding VR titles, but you may need to reduce resolution, graphics quality, or refresh rate.
For a new PC intended specifically for Quest 3 PCVR, buying only for the absolute minimum specification is usually not ideal. A stronger GPU gives you more room to increase render resolution and graphics settings while maintaining stable performance.
CPU: Important for Physics, Simulation, and Consistency
The GPU gets most of the attention in VR discussions, but the processor is important too.
CPU-heavy VR games can involve physics calculations, AI, multiplayer activity, vehicle simulation, and large numbers of interactive objects.
A modern Intel Core i5 or AMD Ryzen 5-class processor is a sensible starting point for a balanced gaming system. More demanding simulators and heavily modified games may benefit from faster CPUs.
How Much RAM Do You Need for Quest 3 PCVR?
For a modern PCVR gaming system, 16 GB of RAM is a practical target, the more is better. Valve also recommends 16 GB for Steam Link VR.
If you regularly run demanding simulators, mods, recording software, browsers, Discord, or other applications alongside VR, 32 GB can provide additional headroom.
SSD vs. HDD for VR Gaming
An SSD will not magically increase your VR frame rate, but it can significantly improve loading times and general system responsiveness.
For a new gaming system, an NVMe SSD is the preferable location for Windows and your most frequently played VR games. Large PCVR libraries can consume storage quickly, so consider capacity as well as speed when planning your system.
How to Set Up Quest 3 for PCVR Step by Step
There are several ways to connect Quest 3 to a PC, but the overall process is straightforward.
Check Your Gaming PC
Before installing anything, verify your system components:
- GPU (Graphics card compatibility and latest drivers)
- CPU (Processor capabilities)
- RAM, i.e. Memory (16 GB minimum recommended)
- Operating System version (Windows 10 or 11)
- Available storage (SSD / NVMe space for VR game installs)
- USB ports specifications if using a wired connection (USB 3.0 / 3.2 Gen 1 5Gbps blue or red ports)
- Router and network configuration if using wireless PCVR (5 GHz / 6 GHz channel setup)
Also check the individual requirements of the specific games you plan to play.
Install the Required PCVR Software
For Meta's PCVR connection, install the Meta Horizon Link PC software.
If you want to play SteamVR games, install Steam and SteamVR as well.
For Steam Link, Steam and SteamVR need to be running on your PC, while the Steam Link app is installed on your Quest headset. Valve states that the PC and headset should be connected to the same network.
Choose Wired or Wireless PCVR
This is one of the most important decisions in your setup. You can use:
- A USB-C Link cable
- Air Link
- Steam Link
- Virtual Desktop
Each option has advantages. A cable prioritizes consistency and does not depend on Wi-Fi quality. Wireless options prioritize freedom of movement but make network quality extremely important. And for a longer gaming session, you need to keep your headset live, so you need a large battery backup headset strap or link cable with a charging facility.
Connect Your Headset
For wired PCVR, connect Quest 3 to a suitable high-speed USB port using a quality USB-C data cable. Meta's current developer documentation recommends a USB-C data cable capable of 5 Gbps or higher for improved performance.
This is an important distinction: not every USB-C cable is designed for high-speed data transfer. Some inexpensive cables are intended mainly for charging.
If you're building a wired PCVR setup, consider a high-speed 5M/16FT Quest Link cable. The additional length gives you more freedom to turn and move while remaining connected to the PC.
For wireless play, connect the headset to your suitable Wi-Fi network and follow the setup process for Air Link, Steam Link, or your preferred streaming application.
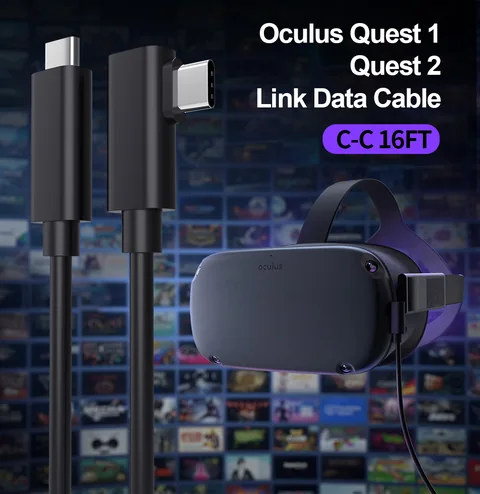
WatchMyVR 5M/16FT USB-C to USB-C Link Cable (CC05)
Rated for 5Gbps high-speed data transmission with ergonomic 90° right-angle connector and reinforced braided nylon jacket. Compatible with Quest 3, 3S, 2 & Pro.
Wired vs. Wireless PCVR: Which Is Better?
Neither method is automatically better for every player. The best choice depends on how you play.
Wired Quest 3 PCVR
A wired connection is attractive when you want predictable and risk-free connectivity and do not want your PCVR stream to depend on Wi-Fi conditions.
A good PCVR cable should provide:
- High-speed data transfer
- Enough length for comfortable movement
- A secure headset connection
- A connector design that does not interfere with movement
- Reliable construction for repeated use
A 5-meter or 16-foot cable is useful for room-scale setups because a short charging cable can severely restrict movement. A 90-degree USB-C connector can also help route the cable along the side of the headset instead of allowing it to stick straight outward.
For users who spend hours playing SteamVR titles, choosing a proper Quest 3 PCVR Link Cable is one of the simplest upgrades to a wired setup.
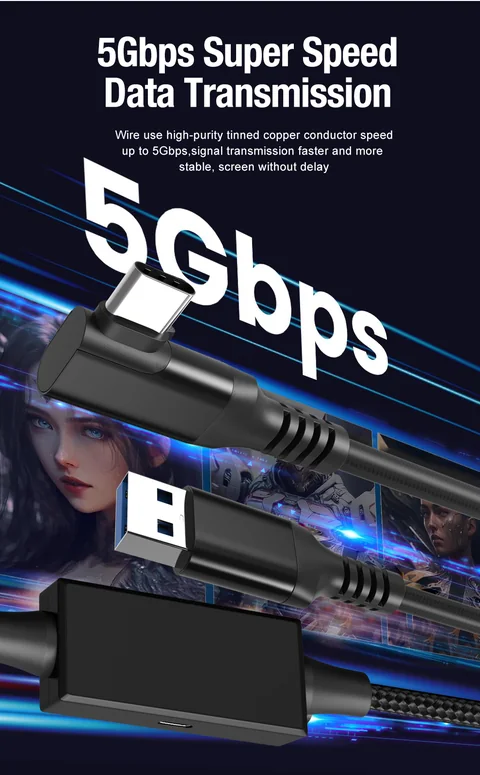
WatchMyVR 16FT Powered Link Cable (CA205)
Engineered with a dedicated separate charge-injection port and Smart IC chip. Simultaneously transmits 5Gbps uncompressed data while delivering active power so your Quest 3 stays at 100% all day.
Wireless Quest 3 PCVR
Wireless PCVR removes the physical cable between your PC and headset. That freedom is especially noticeable in games where you frequently turn, crouch, reach, or move around your play area.
However, wireless performance depends heavily on your local network, wireless channel congestion and router performance.
Steam Link's current minimum requirement is a router using a 5 GHz channel with Wi-Fi 5, while Valve recommends Wi-Fi 6 or Wi-Fi 6E. So Wi-Fi 6/6E is beneficial, but it is not an absolute requirement.
How to Optimize Wi-Fi for Quest 3 Wireless PCVR
A powerful PC cannot compensate for a badly configured wireless network. If the game is rendering correctly on the computer but the network cannot deliver the stream consistently, you may experience compression, latency, stuttering, or sudden drops in visual quality.
Connect Your Gaming PC Through Ethernet
This is one of the most important wireless PCVR improvements. Instead of connecting both your PC and headset wirelessly, connect the gaming PC directly to your router using Ethernet.
Valve specifically describes a wired PC connection and 5 GHz wireless connection for the headset in its Steam Link guidance. This leaves Wi-Fi primarily responsible for communication between your router/access point and Quest 3.
Keep Router Close to Play Area
Distance, walls, floors, and interference can weaken wireless performance. Ideally, your VR router or access point should be in or close to the room where you play. A strong signal is generally more useful than having an expensive router positioned several rooms away.
Reduce Network Congestion
Streaming video, large downloads, cloud backups, and multiple active devices can compete for network resources. If wireless PCVR performance becomes inconsistent, test the headset when other high-bandwidth network activity is paused. For enthusiasts who use PCVR frequently, a dedicated access point or router can make network management easier.
Quest 3 PCVR Settings: Where Should You Start?
There is no universal "best Quest 3 PCVR setting." The correct settings depend on your GPU, game, connection method, and whether you value maximum visual quality or maximum smoothness. The best strategy is to establish a stable baseline and increase quality gradually.
Refresh Rate: 72Hz, 80Hz, 90Hz, or 120Hz?
Quest 3 supports the familiar 72 Hz, 80 Hz, 90 Hz, and 120 Hz display modes, and Meta's Link software supports 120 Hz PCVR operation on Quest 3.
For many PCVR users, 90Hz is a good starting point. It provides smooth motion without creating the same rendering demand as 120Hz.
- 72/80Hz: Useful when your GPU needs more performance headroom.
- 90Hz: A strong balance between smoothness and GPU demand.
- 120Hz: Excellent for smooth motion if your PC can consistently maintain the required performance.
Higher is not automatically better. A stable 90Hz experience can feel better than 120Hz accompanied by frequent frame drops.
Render Resolution: Start Sensibly
Higher render resolution can produce a sharper image, but it also increases GPU workload.
Meta describes render scale as a direct trade-off: increasing resolution improves sharpness but increases GPU usage, while reducing it lowers GPU demand at the expense of image clarity.
Start around the default setting rather than immediately pushing the resolution slider to maximum. Test a demanding game. If performance remains stable, increase the resolution gradually until you find a comfortable balance between clarity and frame rate.
SteamVR Resolution and Per-Game Settings
SteamVR adds another layer of graphics configuration. Avoid blindly increasing global resolution if your Meta software is already using a high render resolution.
Instead, establish a stable global baseline and adjust demanding games individually. Per-game optimization is especially useful because PCVR titles vary enormously in GPU requirements. A rhythm game and a detailed flight simulator should not necessarily use identical graphics settings.
Bitrate and Image Quality
PCVR streaming compresses rendered images before transmitting them to your headset. Higher bitrate can improve image quality and reduce visible compression, but pushing bitrate too far can cause instability or latency.
The goal is therefore not to find the largest possible number. The goal is to find the highest setting your PC and connection can sustain reliably. Change one setting at a time and test it before making another adjustment.
Best PCVR Games to Play on Quest 3
Once your setup is working properly, PCVR gives Quest 3 access to some of the most impressive VR experiences available. Here are several popular PCVR titles worth considering:
Half-Life: Alyx
Half-Life: Alyx remains one of the defining PCVR experiences. Its detailed environments, object interaction, lighting, sound design, and VR-focused mechanics make it an excellent title for seeing what a powerful gaming PC can add to a Quest 3 experience.
Microsoft Flight Simulator
For simulation fans, Microsoft Flight Simulator can provide an extraordinary sense of scale in VR. It is also highly demanding, making it a good example of why powerful PC hardware matters for high-end PCVR.
Assetto Corsa Competizione
Assetto Corsa Competizione is a racing game that works particularly well in VR because the headset naturally replaces the driver's viewpoint. Combined with a steering wheel and pedals, a PCVR racing setup can create a convincing cockpit experience.
No Man's Sky
No Man's Sky offers enormous environments to explore and demonstrates the appeal of combining PC graphics hardware with VR immersion.
Skyrim VR
Skyrim VR remains popular partly because of its large world and extensive modding community. Modding can dramatically change the experience, although heavily modified installations can also increase hardware requirements.
Beat Saber
Beat Saber is available without a PC, but PCVR players may still choose the PC version depending on their library and preferred setup. Its fast movement also makes it useful for testing latency and tracking responsiveness.
Essential Quest 3 Accessories for PCVR
A powerful GPU improves the image, but PCVR is not only about graphics. Comfort, battery life, cable management, controller security, and lens protection can make a major difference during longer sessions.
1. A High-Speed PCVR Link Cable
If you prefer wired PCVR, a reliable Link cable should be near the top of your accessory list. Look for:
- USB 3.x data capability
- High-speed data transfer
- Sufficient cable length
- Durable connectors
- A headset-friendly angled USB-C connector
A 5M/16FT high-speed PCVR cable gives you significantly more movement than a short USB cable and is better suited to a room-scale setup.
2. A More Comfortable Head Strap
The original strap works, but comfort becomes increasingly important as sessions get longer. An upgraded Quest 3 head strap can provide:
- Better weight distribution
- More secure fit
- Reduced facial pressure
- Easier adjustment
This is particularly valuable for PCVR because PC games often encourage longer sessions than quick standalone experiences.
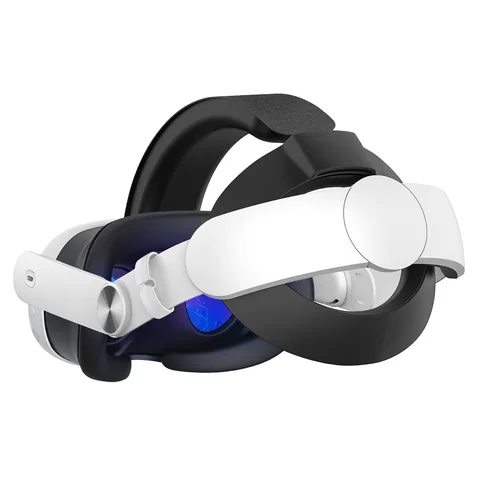
WatchMyVR Elite Comfort Head Strap (Q3-1)
Redistributes headset gravity away from facial pressure points. Features rear dial tension adjustment, memory foam padding, and ultra-flexible side rails.
3. Battery Head Strap
Wireless PCVR eliminates the cable, but headset battery life becomes more important. Meta lists Quest 3 battery life at approximately two hours under its general device specifications, although actual runtime varies with use.
A Quest 3 battery head strap can extend your play session while also acting as a counterbalance at the rear of the headset.
For users who regularly play wirelessly, it can solve two problems at once: battery capacity and weight distribution.
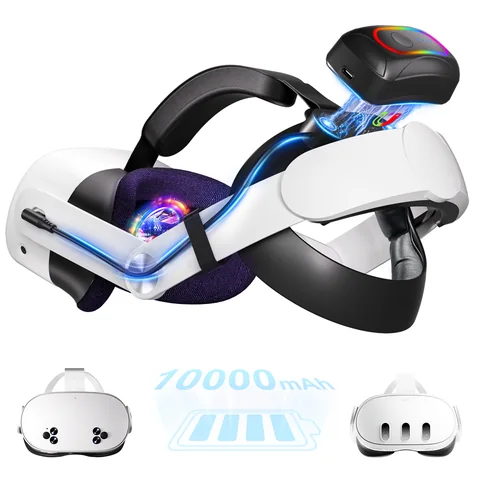
WatchMyVR 10,000mAh Magnetic Battery Strap (Q19)
High-capacity hot-swappable magnetic power pack that extends gameplay by 4-6 hours. Perfectly counterbalances the front visor for fatigue-free wireless PCVR.
4. Controller Grips
Fast VR games involve large hand movements. Controller grips or knuckle-style straps help keep the controllers secure while allowing you to relax your grip. They can be especially useful for:
- Fitness games
- Rhythm games
- Shooters
- Boxing games
- Active room-scale experiences
5. Lens Protection
Quest 3 lenses are one of the most important parts of the headset. A simple lens cover can help protect them from dust and accidental contact while the headset is stored.
If you wear glasses, consider appropriate lens protection or prescription inserts to reduce the risk of the glasses and headset lenses touching.
6. Charging Dock
If you use Quest 3 frequently, keeping the headset and accessories organized and charged can become part of the daily routine. A Quest 3 charging dock creates a dedicated location for the headset instead of leaving cables and accessories scattered around the desk.
It is not required for PCVR performance, but it can make a frequently used setup more convenient.
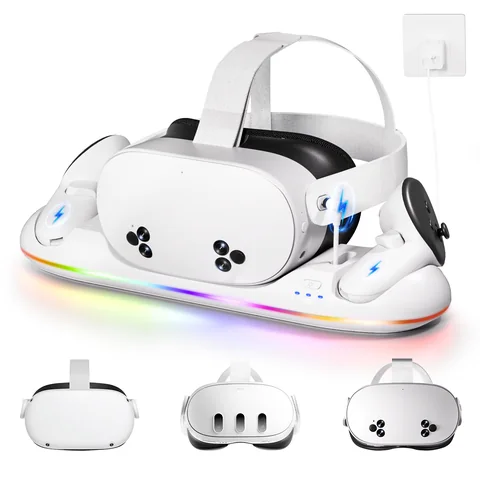
WatchMyVR RGB Fast Charging Dock Station (Q22)
Magnetic drop-in dock charges headset and Touch Plus controllers simultaneously. Features LED status indicators and intelligent overcharge protection.
How to Fix Common Quest 3 PCVR Performance Problems
Even a good PCVR setup can occasionally develop problems. Before replacing hardware, identify whether the issue comes from the PC, USB connection, wireless network, or game settings.
PCVR Looks Blurry
Check the following settings:
- Render resolution in Meta Link / SteamVR
- In-game internal graphics resolution
- Streaming quality & dynamic bitrate
- Wi-Fi signal quality & channel width
- Lens cleanliness and headset physical IPD positioning
Do not immediately maximize every setting. Increase quality gradually while monitoring performance.
PCVR Is Stuttering
Stuttering can come from several sources:
- GPU usage reaching 99-100% saturation
- CPU bottlenecks / thread spikes
- Available RAM exhausted by background programs
- Wireless channel congestion / Wi-Fi interference
- Missing Ethernet connection on host PC
- Excessive render resolution or refresh rate (120Hz)
If reducing resolution immediately improves performance, your GPU may be the limiting factor. If the game runs smoothly on PC monitor but stutters in headset, investigate your connection.
Link Cable Keeps Disconnecting
Try another USB port and check that the cable supports high-speed data rather than charging only.
Meta includes a USB connection test inside its Link PC software for supported workflows, which can help identify poor connection speeds or sub-2.0 Gbps throughput.
Avoid putting unnecessary strain on the USB-C connector while moving. Use a cable with a 90° right angle and secure velcro tie.
Wireless PCVR Has High Latency
First confirm that:
- Your host PC uses an Ethernet LAN cable to the router
- Quest 3 is connected to dedicated 5 GHz or 6 GHz band
- The router is in direct line of sight in your play area
- Local network congestion is minimal
- You are not using a guest or isolated network
Steam notes that networks with client isolation, including many guest, workplace, school, and public networks, can prevent Remote Play connectivity.
How to Build the Best Quest 3 PCVR Setup
The best PCVR setup is not necessarily the most expensive one. It is the setup where every component works together. For a balanced experience, focus on four areas:
Start with stability before chasing maximum visual settings. A stable frame rate, comfortable headset, and reliable connection usually contribute more to immersion than simply pushing every graphics slider to its maximum value.
Frequently Asked Questions: Quest 3 PCVR Setup
Yes. Quest 3S can use essentially the same PCVR setup as Quest 3, and you do not need a more powerful PC simply because you are using a Quest 3S. Meta officially supports both Quest 3 and Quest 3S with Meta Quest Link through a compatible USB cable or Air Link connection. Both headsets also use the Snapdragon XR2 Gen 2 chipset and support refresh rates up to 120Hz (Meta for Developers).
In fact, Quest 3S has a lower per-eye display resolution of 1832 × 1920, compared with 2064 × 2208 on Quest 3. Your actual PC performance will depend much more on the PCVR game, render resolution, refresh rate, graphics settings, and GPU than on choosing Quest 3S instead of Quest 3 (Meta for Developers).
Yes. Quest 2 can still be used for PCVR gaming. Meta officially supports Quest 2 with Meta Quest Link, allowing you to connect it to a compatible Windows gaming PC through a USB-C Link cable or Wi-Fi connection (Meta for Developers).
Quest 2 also supports Steam Link, so you can wirelessly stream compatible SteamVR games from your gaming PC. Valve's current Steam Link requirements list Quest 2 among the supported headsets (Meta).
For wired gaming, a quality USB 3.x PCVR Link cable is recommended. Meta recommends a USB-C data cable supporting 5 Gbps or higher for improved performance, making a long 5M/16FT high-speed cable useful for players who want more freedom of movement while playing PCVR (Meta for Developers).
Final Thoughts
Setting up Quest 3 for PCVR does not have to be complicated.
Start with a capable gaming PC, choose whether you prefer wired or wireless play, establish stable settings, and then improve image quality gradually. If you use wireless PCVR, give your network the same attention you give your graphics card. If you prefer wired PCVR, use a proper high-speed data cable with enough length for comfortable movement.
Most importantly, build your setup around the way you actually play.
A competitive or seated player may value the consistency of a wired connection. A room-scale player may prefer wireless freedom combined with a comfortable battery head strap. A simulation enthusiast may prioritize GPU performance and visual clarity above everything else.
Once the fundamentals are right, accessories such as a 5M/16FT PCVR Link Cable, Quest 3 battery head strap, controller grips, and charging dock can make the overall setup more comfortable and convenient.
Quest 3 already provides an accessible entry into VR. Pairing it with the right PC, connection, settings, and accessories takes it much further, giving you access to the scale, graphical detail, and game library that make PCVR worth exploring.